Return to Shipper
In certain cases — such as order cancellation or refusal by the final customer — the logical next step is to return the shipment to the original sender. This is the purpose of the Return to Shipper feature.
Accessing the Return to Shipper Screen
- From the sidebar, go to Operations → Return to Shipper.
- You will find two sub-tabs:
- New Return – to initiate a new return process.
- Return List – to view and manage previous returns.
Creating a New Return
To initiate a new return:
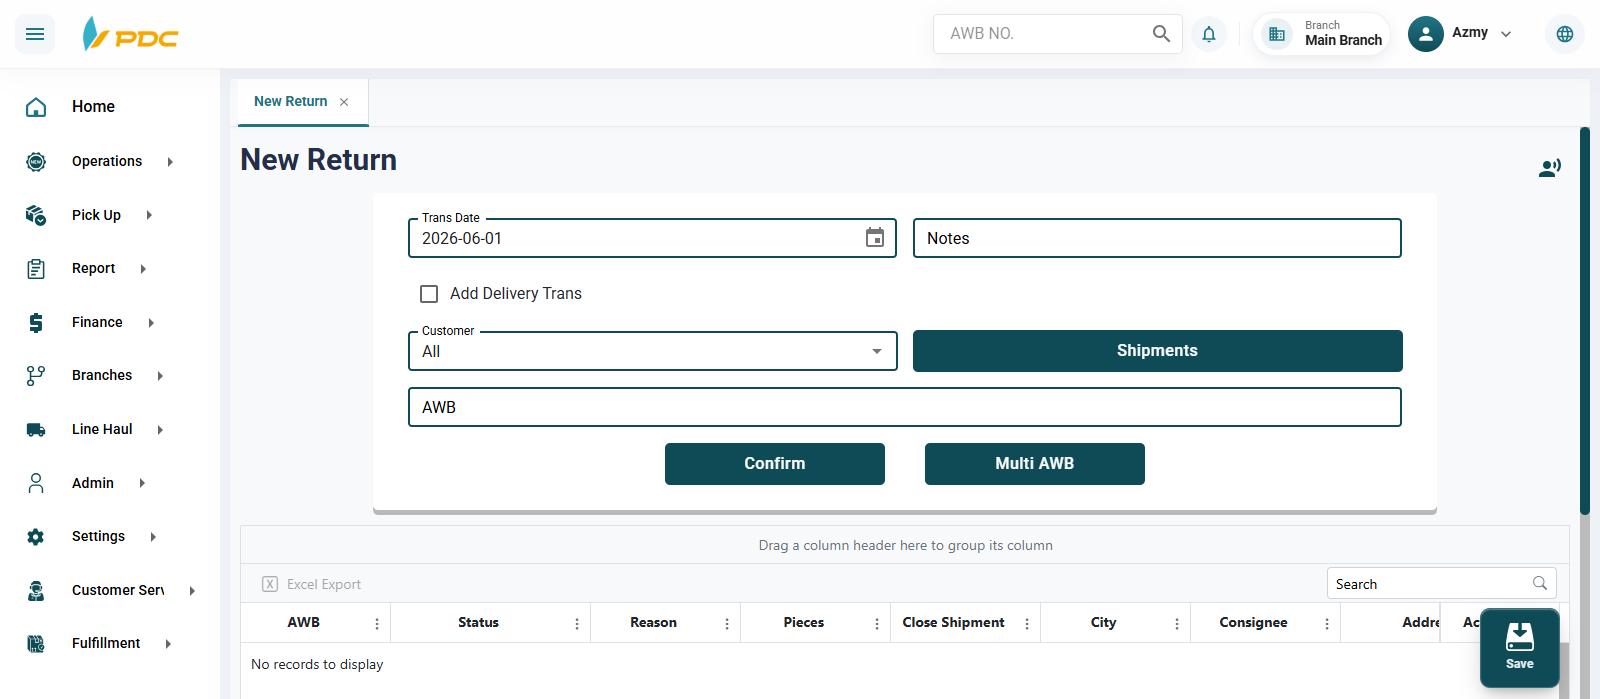
- Open the Customer tab.
- Select the required customer.
- Click the Shipments button.
- The system will display the customer's shipments available for return.
- Select the shipments to be returned to the shipper.
Or Return by Shipment Number
- Select the transaction date.
- Add notes if required.
- If returning a single shipment, enter the shipment number in the shipment field. For multiple shipments, click the Multiple Shipments button and enter the shipment numbers.
- Click Confirm.
- Review the shipments displayed in the grid below.
- Click Save.
Confirmation and Posting
After clicking Save, you will be redirected to the Return List page.
- A new Transaction ID will appear in the Pending table with the exact date and time.
- You can return to this list at any time.
- To edit, click the pencil icon in the Actions column.
Final Confirmation
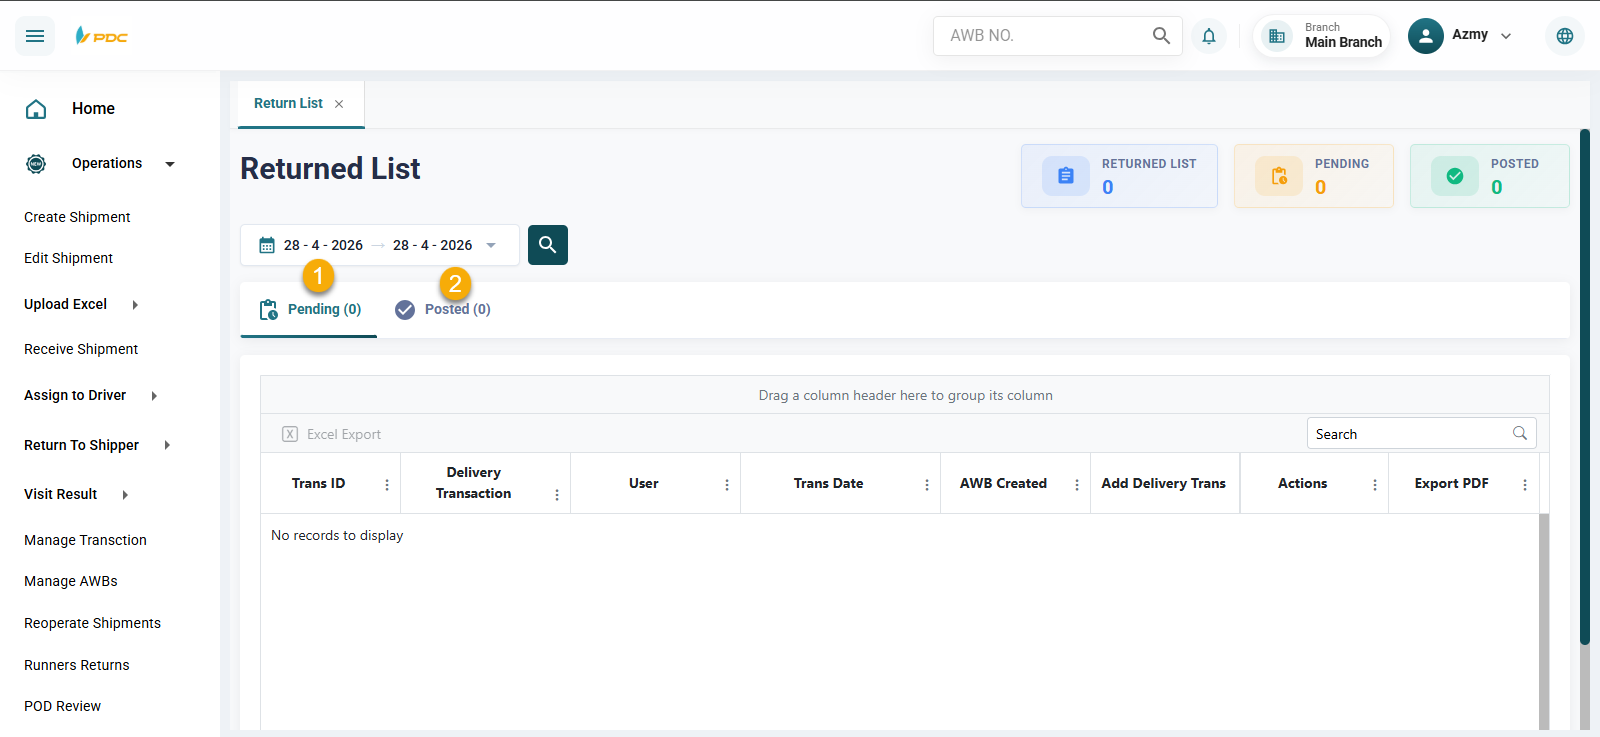
- To finalize and post the return:
- Click the Post icon (green double checkmark) in the Actions column.
- Then click Post in the confirmation dialog to confirm the return.