Create Shipment
When sending any shipment from point A to point B, a set of essential data must be provided to ensure the process is completed successfully — such as shipment details, shipper information, and consignee (recipient) information.
Open the Create Shipment Page
From the side menu, click Operations, then select Create Shipment.
Required Data
The Create Shipment page is divided into five main sections:
- Shipment Details
- Shipper Details
- Consignee (Recipient) Details and Additional Information
- Delivery Types and COD
- Special Instructions
⚠️ Note: Each section will be explained in detail, including the mandatory fields and data validation rules required to successfully create a shipment.
Shipment Details
The Shipment Details section is the first and most essential part of creating a new shipment. It contains several fields, including mandatory fields that must be completed in order to save the shipment.
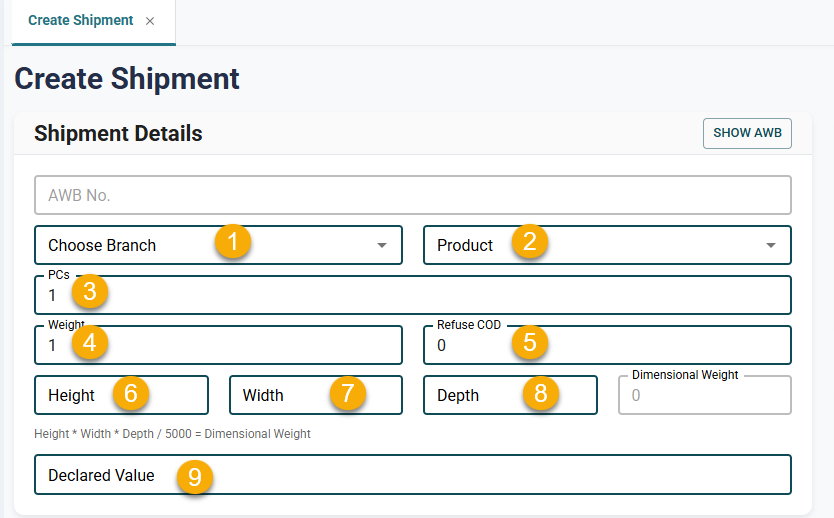
Mandatory Fields:
- Branch Selection (Required)
- Product (Required)
- Cash on Delivery Amount (COD) (Required)
- Refuse COD Amount (Required)
⚠️ COD Amount Rules:
- COD values must be entered as whole numbers only; decimal values are not allowed.
- If the selected product type is “Returns”, the COD amount must be entered as a negative value.
Other Fields:
- Shipment Number: It is recommended to leave this field empty so the system can generate it automatically.
- Date: Automatically set to the current date.
- Quantity: Number of items in the shipment.
- Weight (Required): Actual shipment weight.
- Length – Width – Height: Shipment dimensions.
- Volumetric Weight: Calculated based on the entered dimensions.
What Is Volumetric Weight?
Volumetric weight is a pricing method used to calculate shipping costs based on the shipment’s size rather than its actual weight. This is because some packages occupy a large amount of space despite being lightweight.
Volumetric weight is calculated using the following formula:
Volumetric Weight = (Length × Width × Height) ÷ Divisor
The divisor is typically 5000 for most air freight services, but it may vary depending on the shipping method or if the shipment is handled via sea freight.
Example: Assume the actual weight of the shipment is 6 kg, and its dimensions are 50 × 40 × 30 cm.
Volumetric Weight = (50 × 40 × 30) ÷ 5000 = 60000 ÷ 5000 = 12 kg
In this case, 12 kg will be considered the billable weight instead of the actual 6 kg.
It is recommended to enter all available details to ensure higher shipment accuracy and easier tracking throughout the storage and shipping lifecycle.
Shipper Details
This is the second section of the shipment creation process, where shipper information is entered.
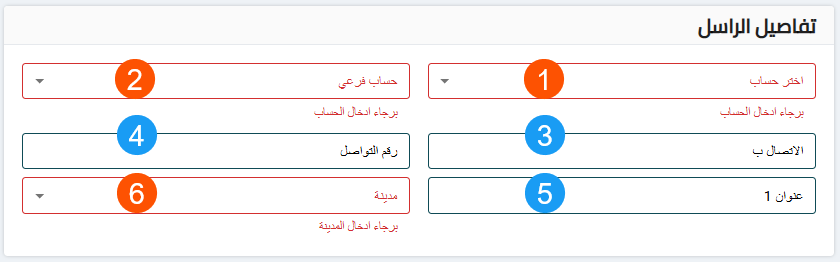
Mandatory Fields in This Section:
- Customer Account (Required)
- Sub Account (Required)
- City (Required)
Other details such as the responsible person’s name, phone number, and address should also be completed to ensure smooth communication and correct account linkage.
Consignee (Recipient) Details
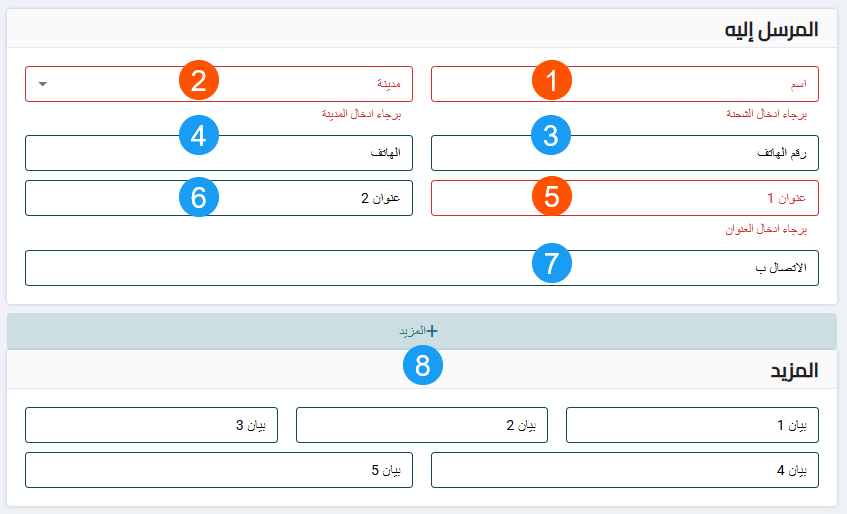
This is the third section of the shipment creation process and is one of the most important sections to ensure successful delivery.
Mandatory Fields:
-
Consignee Name (Required)
-
City (Required)
-
Phone Number (Required)
- Must consist of 11 digits
- Must start with 0
- Must not contain any letters or special characters
-
Address (Required)
- Must be at least 5 characters long
Entering accurate and valid consignee information helps reduce delivery failures and speeds up the shipping process.
Delivery Types and COD
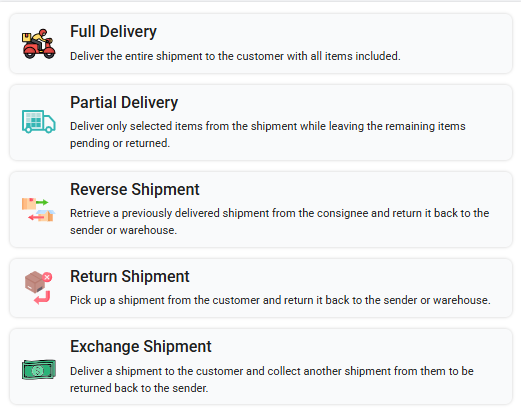
Select the appropriate shipment type based on the delivery method:
-
Delivery Shipment: Delivering the shipment in full with all its contents.
-
Partial Delivery: Delivering part of the shipment contents while the remaining items stay pending or returned.
-
Reverse Shipment: Retrieving a shipment that was previously delivered and returning it to the sender or warehouse.
-
Return Shipment: Collecting a shipment from the customer and returning it to the sender or warehouse.
-
Exchange Shipment: Delivering a shipment to the customer while collecting another shipment from them to be returned to the sender or warehouse.
COD Management
This is a separate option used to define the Cash on Delivery (COD) amount. It does not affect the shipment type but determines the amount of cash to be collected from the customer upon delivery.
💰 COD is mandatory when this field is used. The specified amount will be paid to the courier.
Show AWB
The Show AWB tab allows you to view images of Air Waybills (AWB) uploaded by couriers through the Pickup Scan portal during the pickup process.
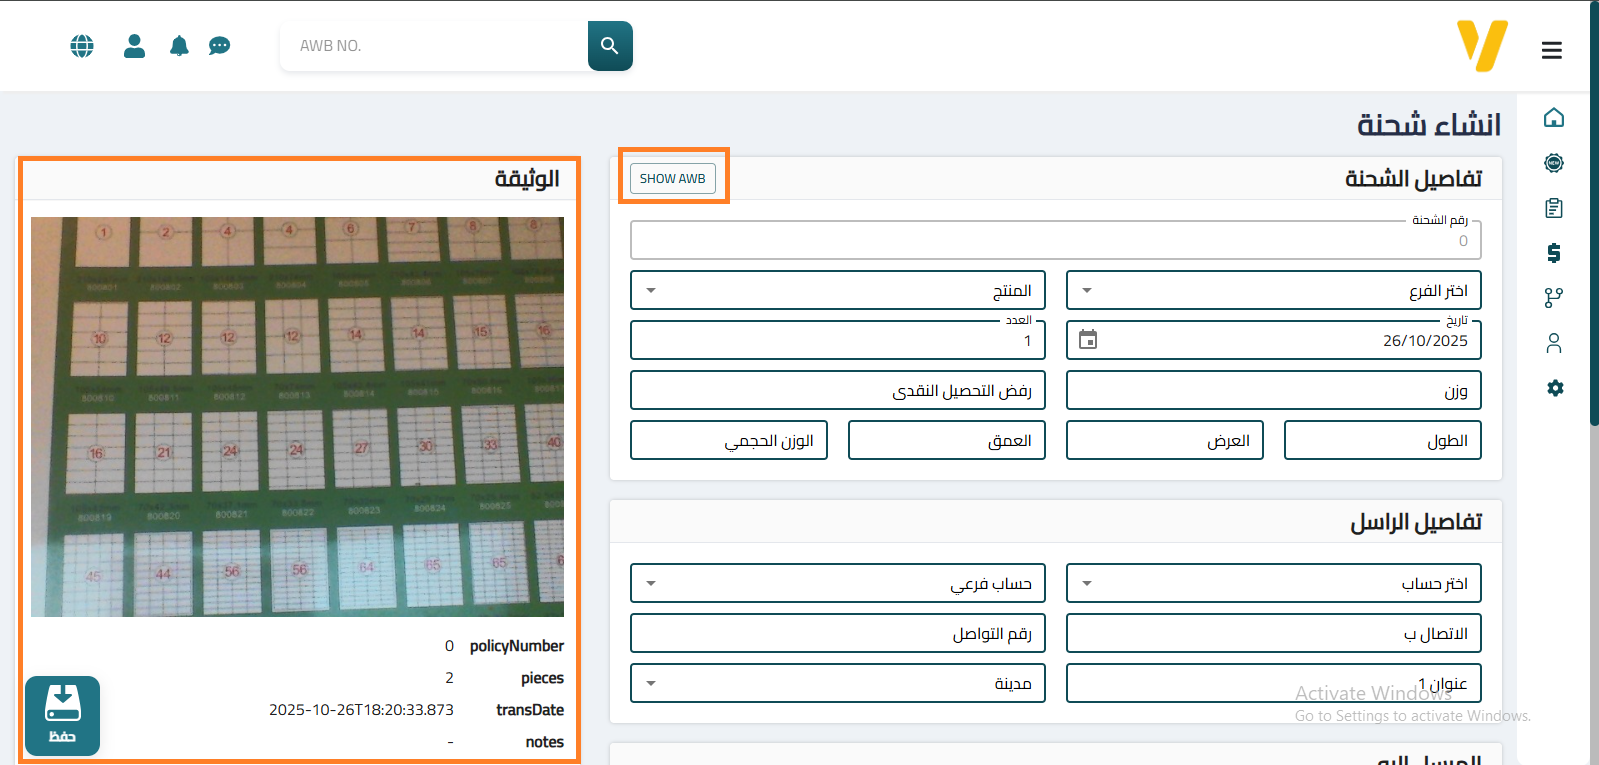
This tab displays the AWB image along with the shipment number and its details as uploaded by the courier. It helps operations staff review the uploaded data and complete shipment details in the system until the pickup process is fully finalized.
⇢ Special Instructions

This is the final section of the shipment creation process. It includes options that help customize how the shipment is handled.
You can enable “Allow customer to open shipment” to grant the end customer permission to open the shipment before accepting it.
Additionally, you can enter any extra notes or special instructions — such as shipment contents or special handling steps, especially if the product is fragile or requires special care.
Printing Shipping Labels
Once the shipment is successfully saved, you can print the shipping labels directly from the same page. Click the Print AWB button as shown in the image.
You can choose from multiple label layouts based on your preferred print format or printer type. These labels are attached to the shipment during transportation or delivery and include all essential shipment data such as the shipment number, shipper, consignee, and COD amount.