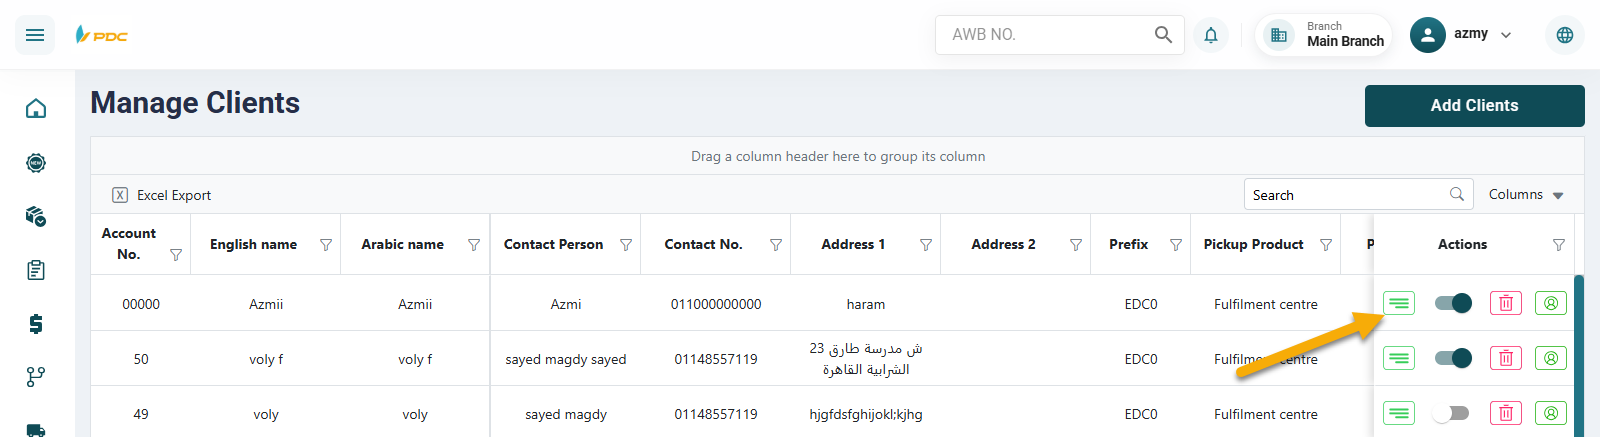
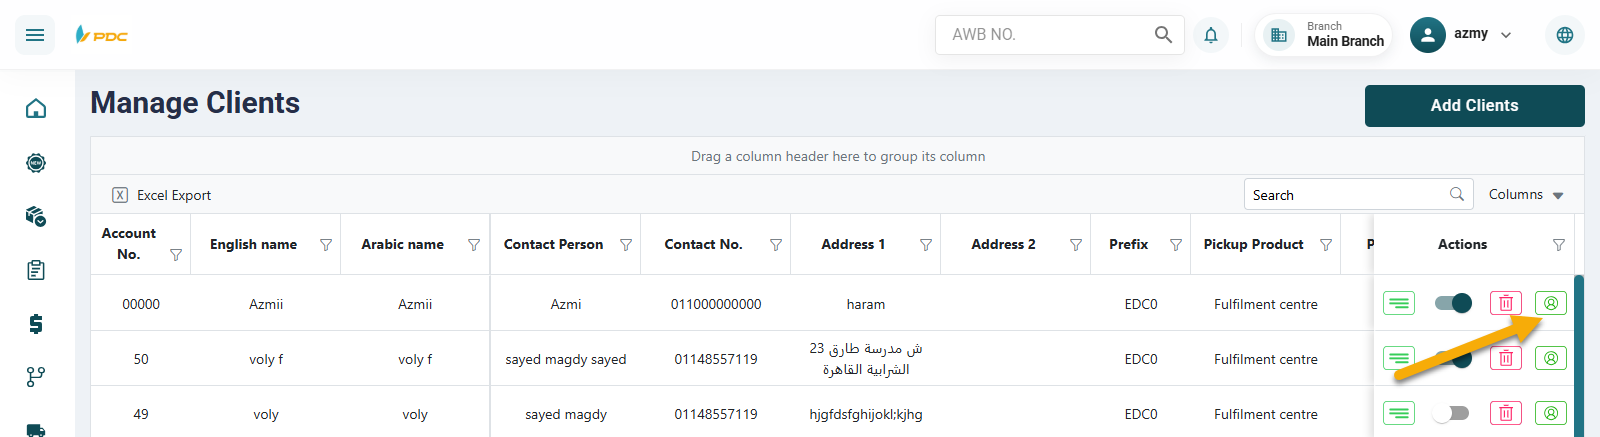
Manage Clients
The Manage Clients screen lets you manage direct client accounts (shipping companies) with ease, whether they are main accounts or sub-accounts. It also allows you to define the services available for each account, with the option to activate or deactivate the account at any time.
Access
From the Finance menu, select Manage Clients.
Internal Actions
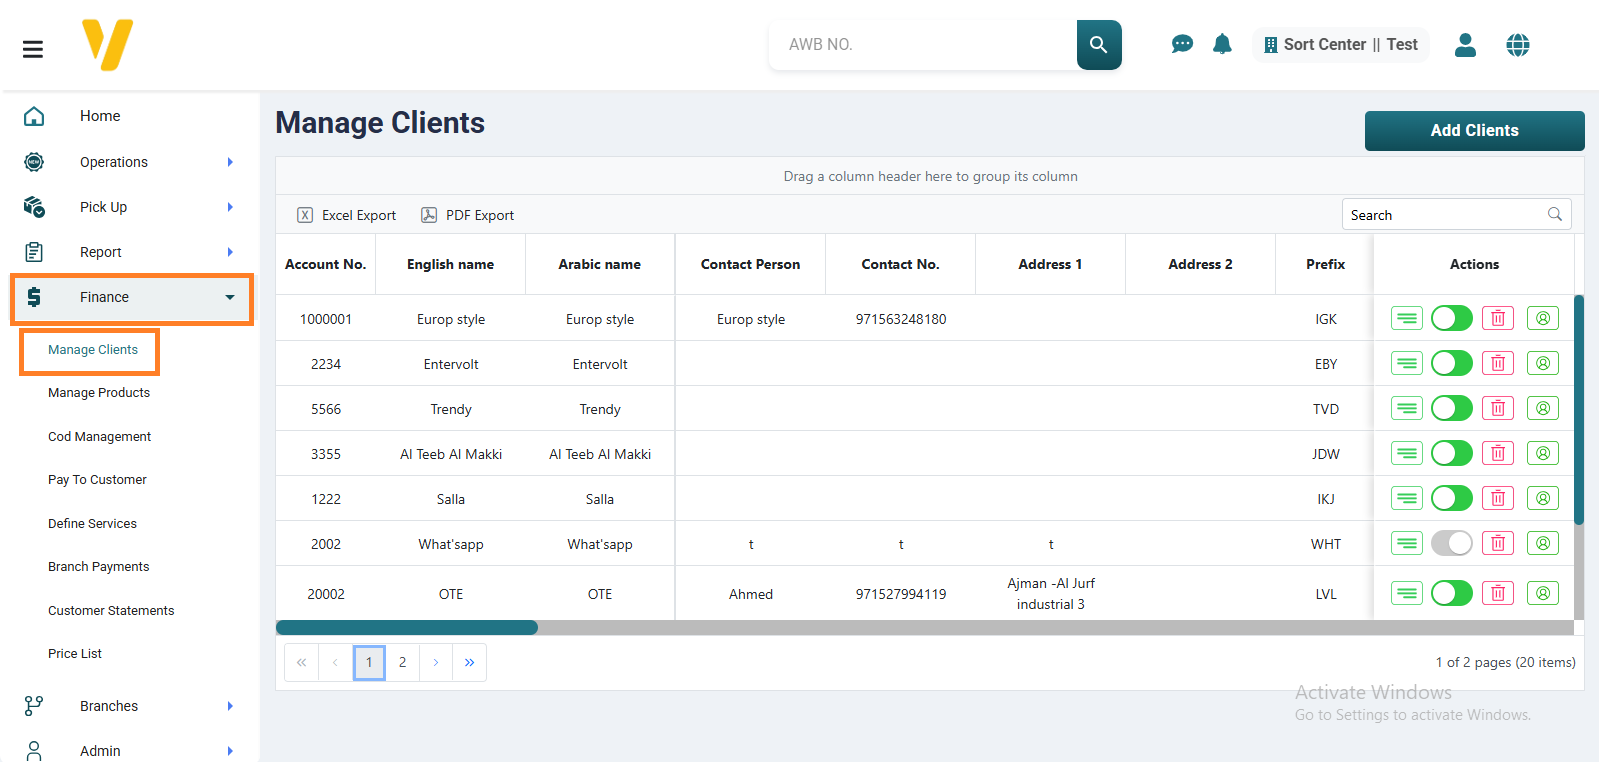
Here’s what you can do on the Manage Clients page:
- Add a client: Click the
Add Clientsbutton. - Edit an existing client: From the
Actionscolumn, click theediticon. - Activate / Deactivate a client: From the
Actionscolumn, use thetoggleswitch. - Delete a client: From the
Actionscolumn, click thedeleteicon.
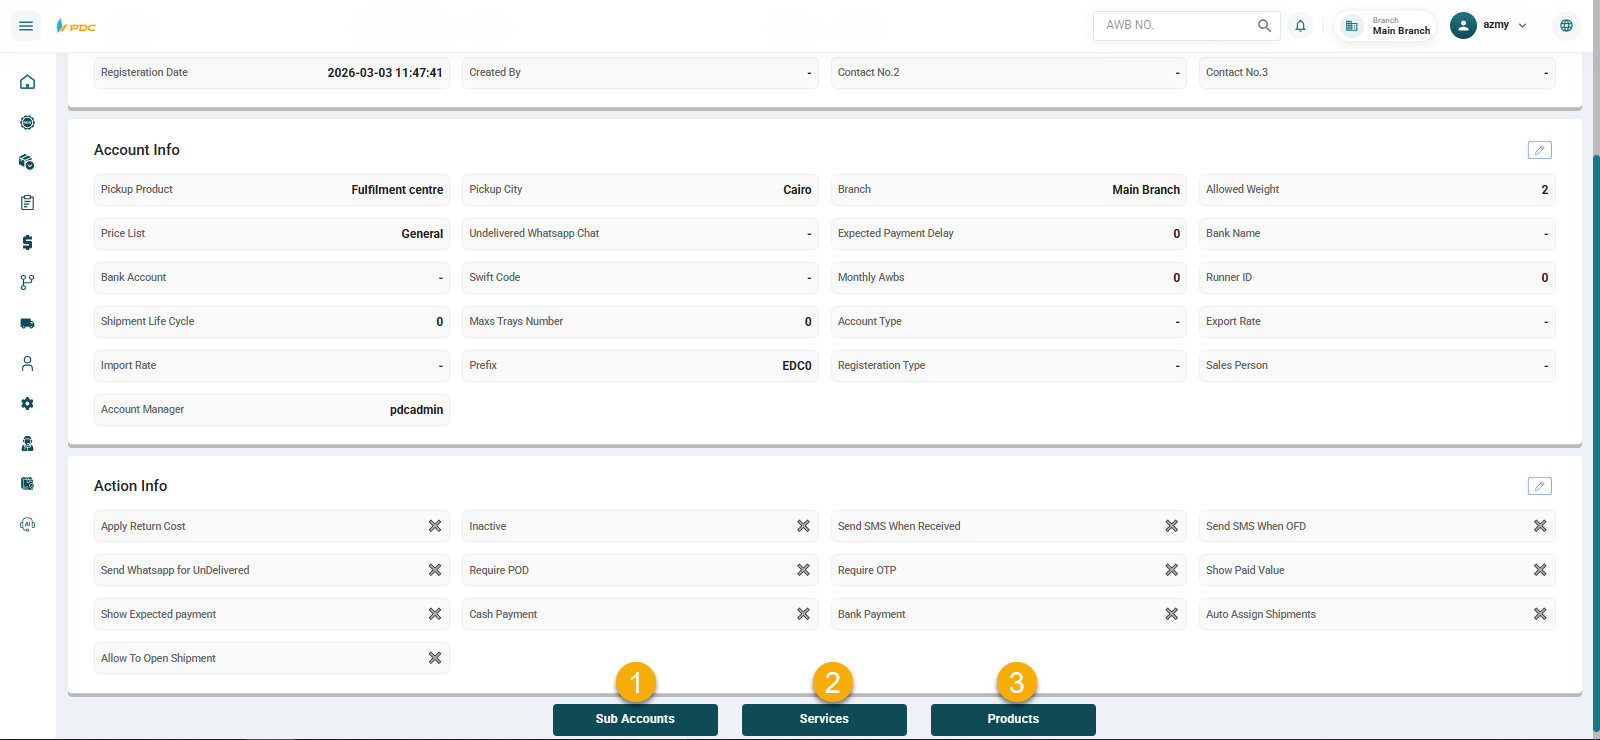
Customer Details
The Customer Details page displays all information related to the created customer and allows editing any previously entered data directly from this page.
This page also includes three main sections that can be linked to the customer:
- Sub-Accounts
- Services
- Products
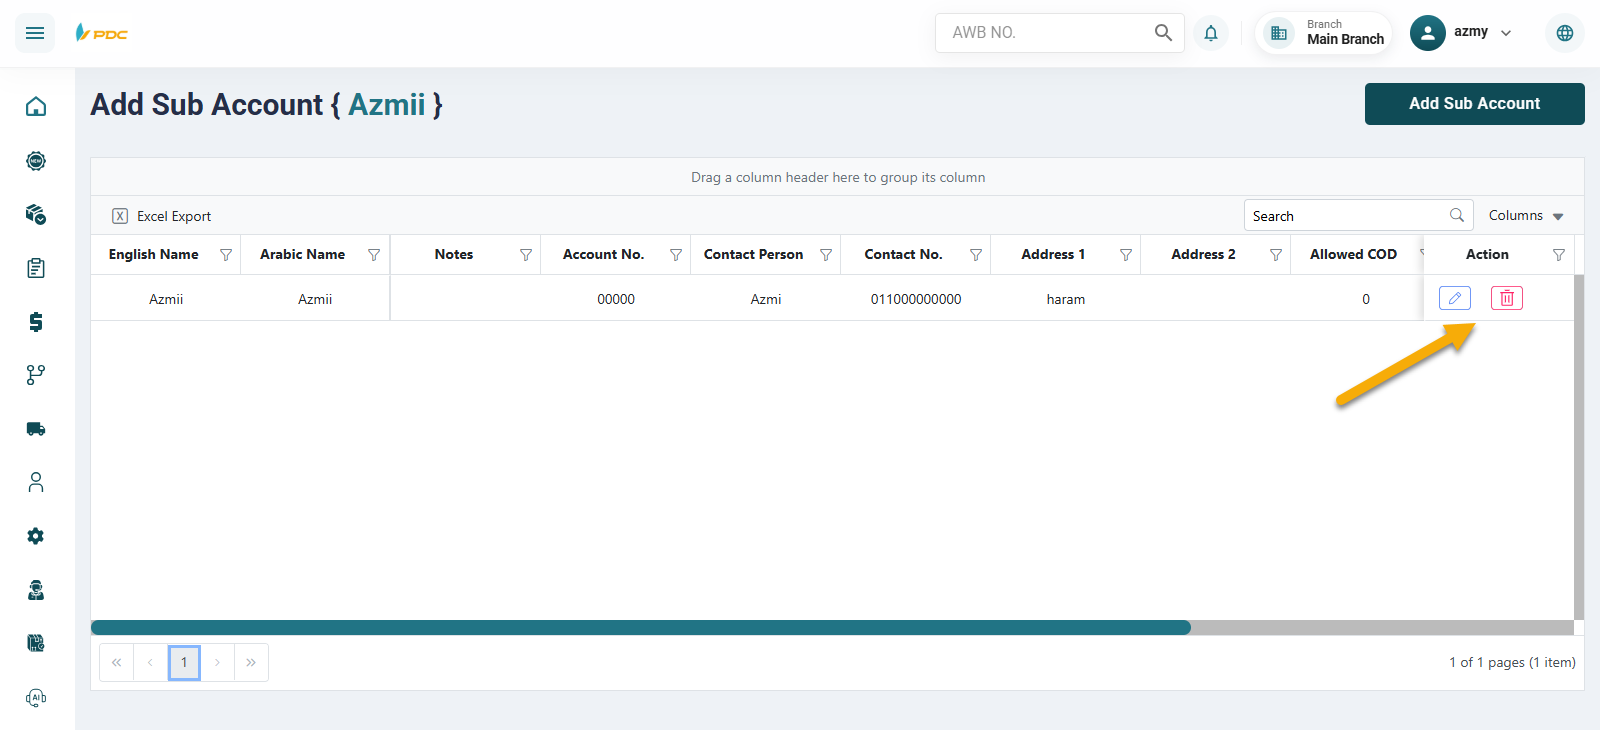
First: Sub-Accounts
Sub-Accounts allow creating accounts under the main customer account.
How to Create a Sub-Account:
-
Go to the Sub-Accounts section.
-
Click on Add Sub-Account.
-
Enter the required information:
- Account Number
- Assign the account to a City
- Name (Arabic)
- Name (English)
- Contact Person
- Contact Number
- Address
- Assign a Price List
- Assign a Branch
- Allowed Weight
-
Click Save to register the sub-account.
You can also Edit or Delete the sub-account using the action buttons in the Actions column.
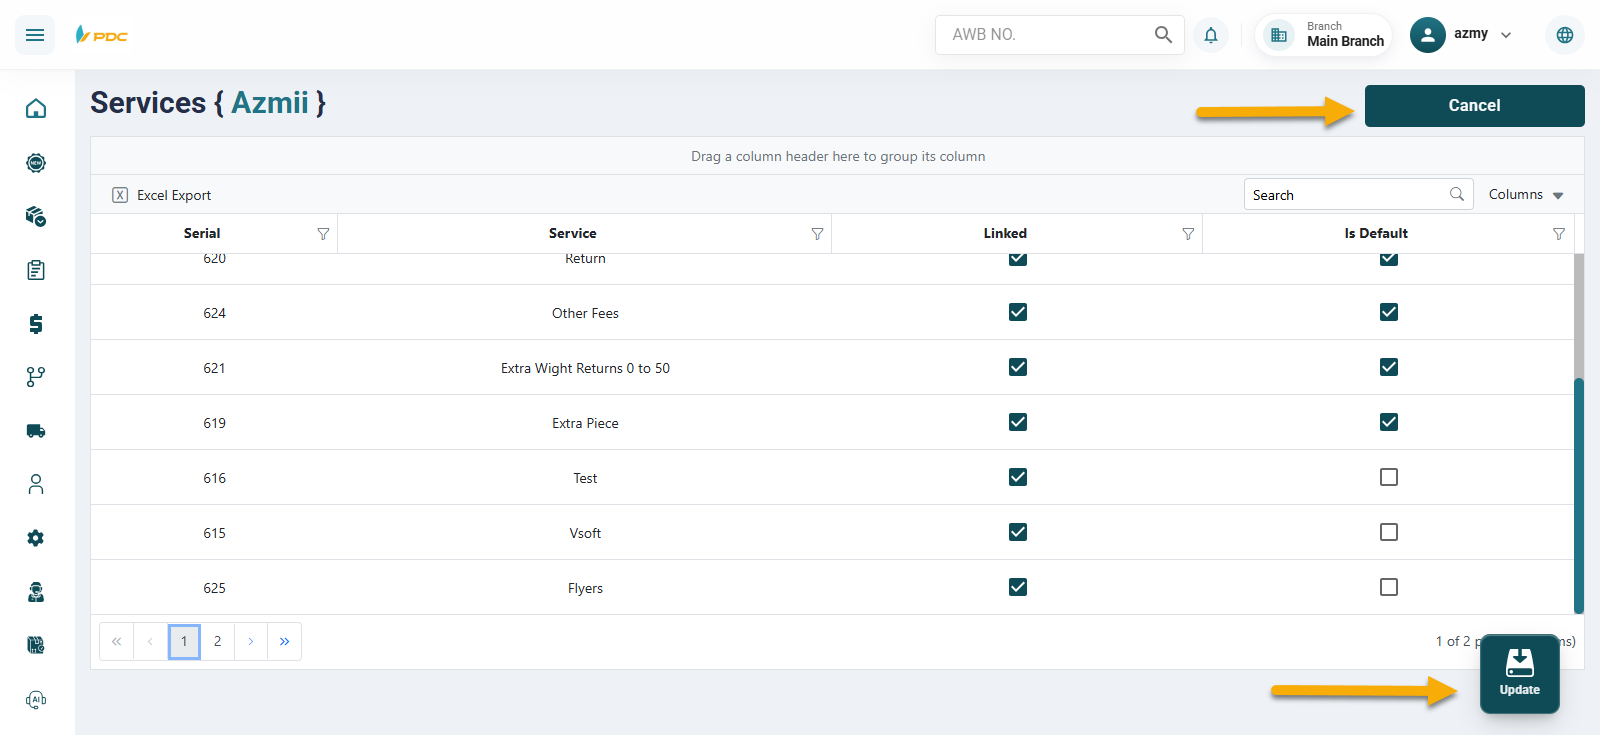
Second: Services
Through the Services section, you can link the customer to the services that were previously created in the Services page.
How to Link Services:
- Click Edit.
- A list of available services will appear.
- Select the services you want to link by checking the corresponding boxes.
- Click Update to save the changes.
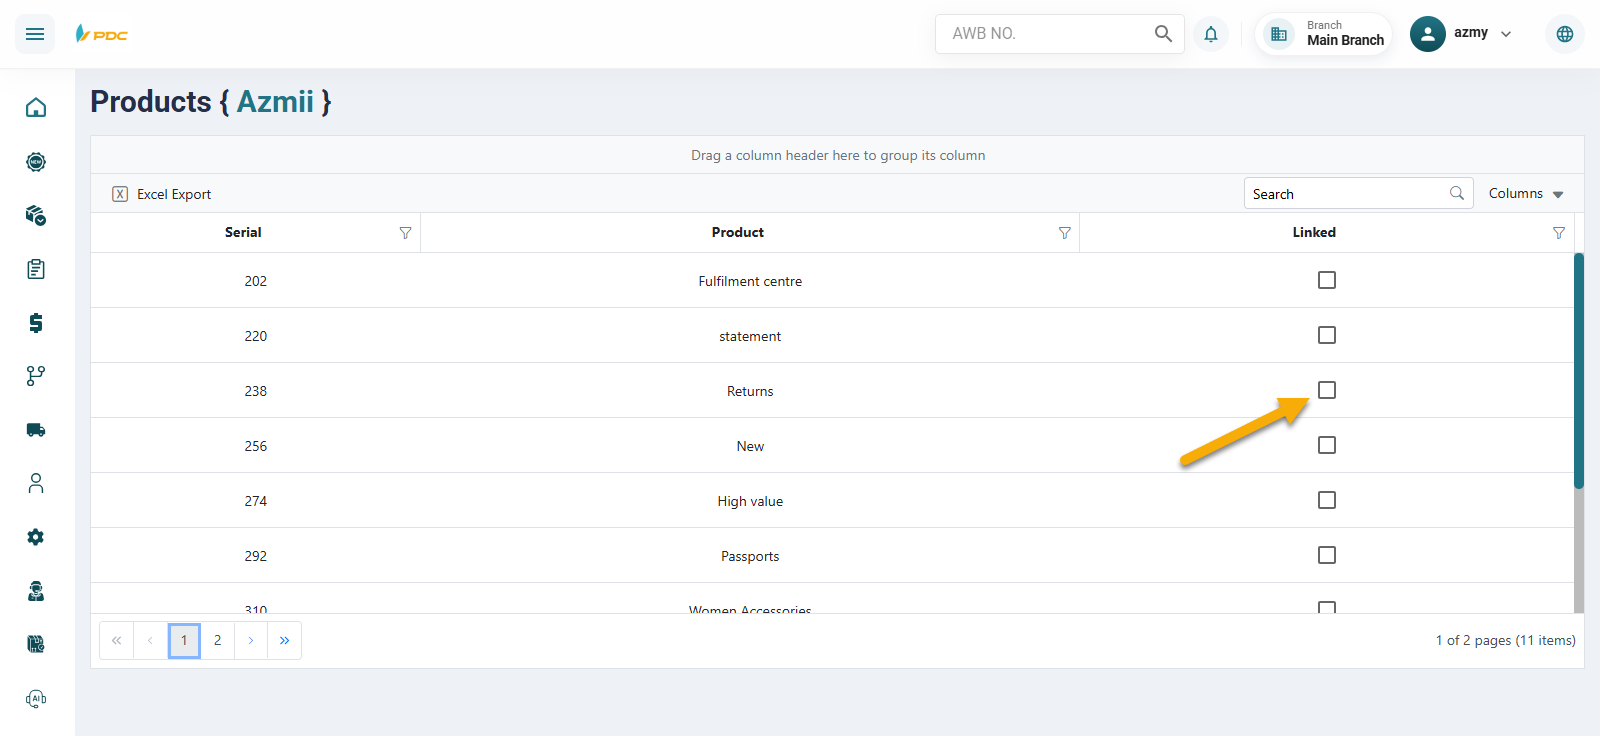
Third: Products
Through the Products section, you can link the customer to products that were previously added in the Products page.
How to Link Products:
- Open the Products section.
- A list of available products will appear.
- Select the desired products by checking the corresponding boxes.
- Save the selection.
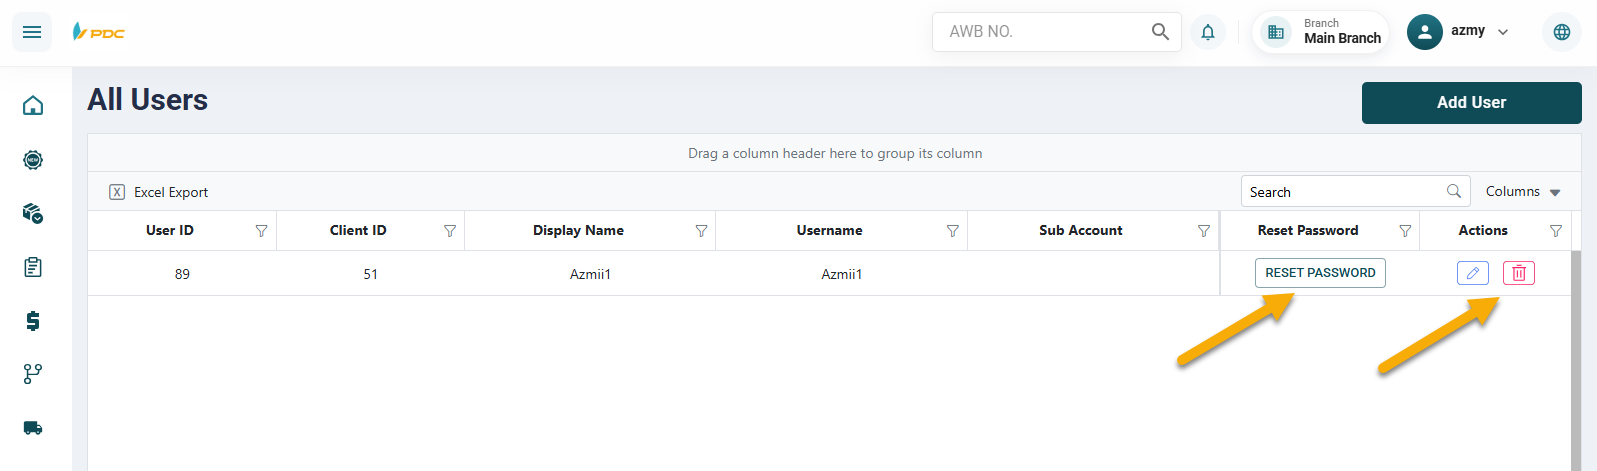
User Management Button
Through the User Management section, you can create a username and password for customers to access the Customer Portal.
How to Create a User:
-
Go to User Management.
-
Click Add User.
-
Enter the following details:
- Display Name (as shown on the portal)
- Username
- Password
-
Define user permissions:
- Link the user to a specific sub-account OR
- Grant access to the entire main account
-
Click Save.

You can also:
- Reset the password
- Edit user details
- Delete the user
Access Token
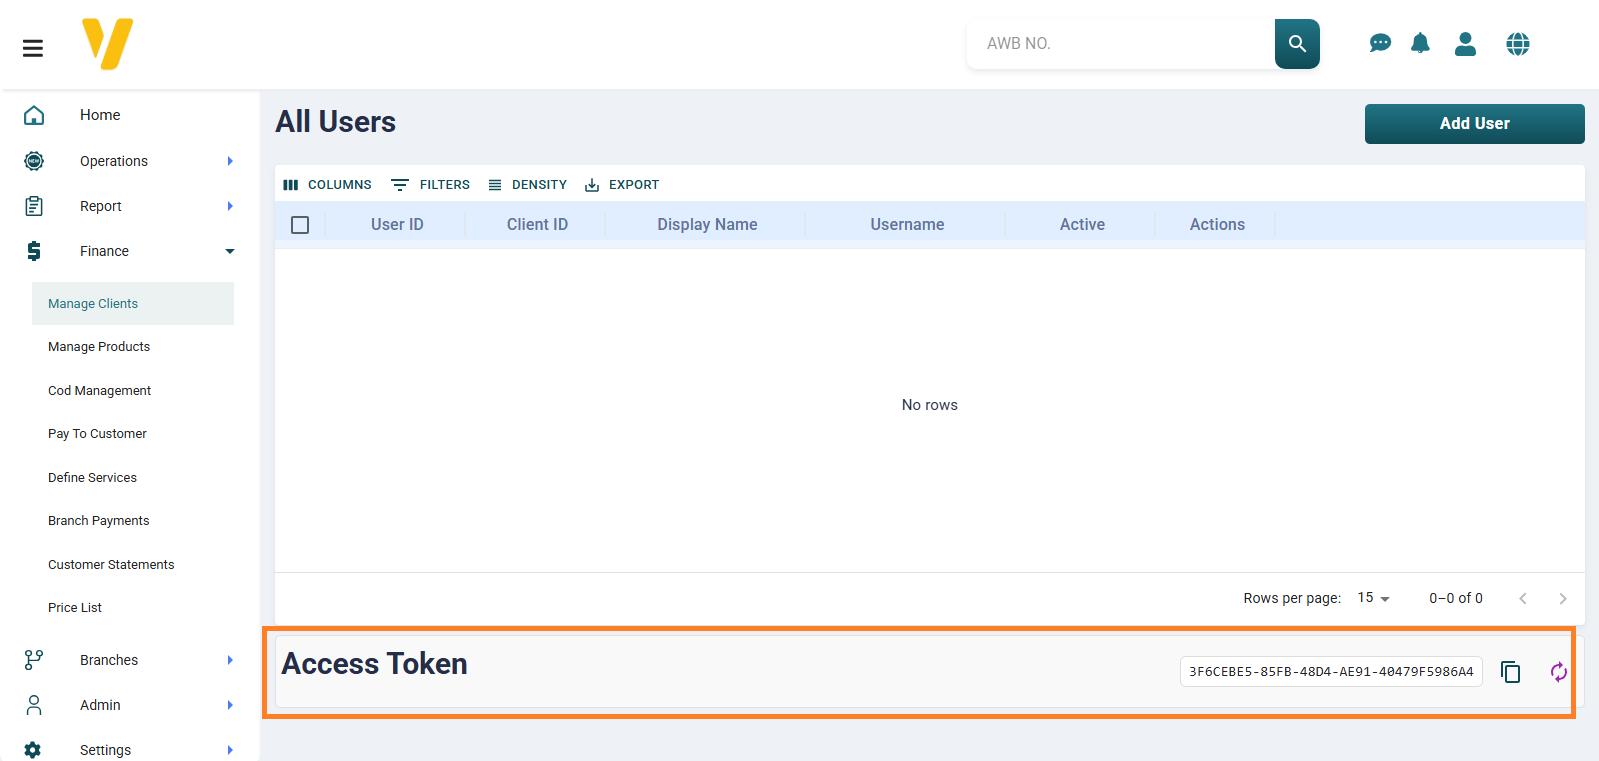
The Access Token is used as a secure method to integrate the system with external platforms or applications, allowing data exchange between systems without the need to log in each time.
How to Access the Token: You can access the Access Token by following these steps:
- From the side menu, select Accounts.
- Then choose Customer Definition.
- From the Customer Definition page, click on the User icon located on the side of the page.
- The Access Token will appear at the bottom of the page and can be copied or refreshed when needed.