Areas
The Areas is used to define and manage the geographical areas that the company serves and covers.
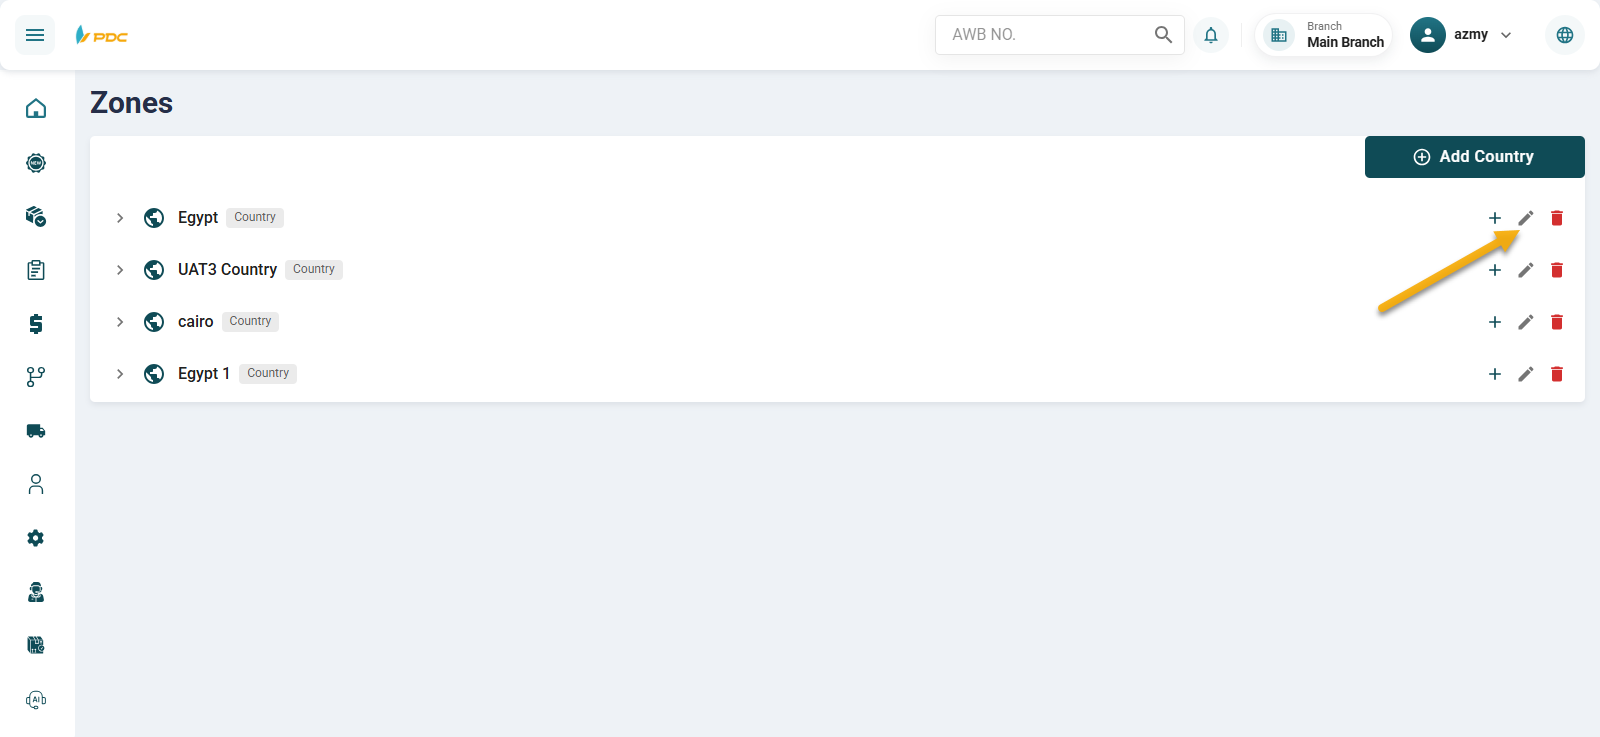
When accessing the Areas screen, a list of countries already added to the system will appear.
Adding a New Country
By clicking the Add Country button, you can add a new country to the system.
Required Fields:
- Country Name (Arabic)
- Country Name (English)
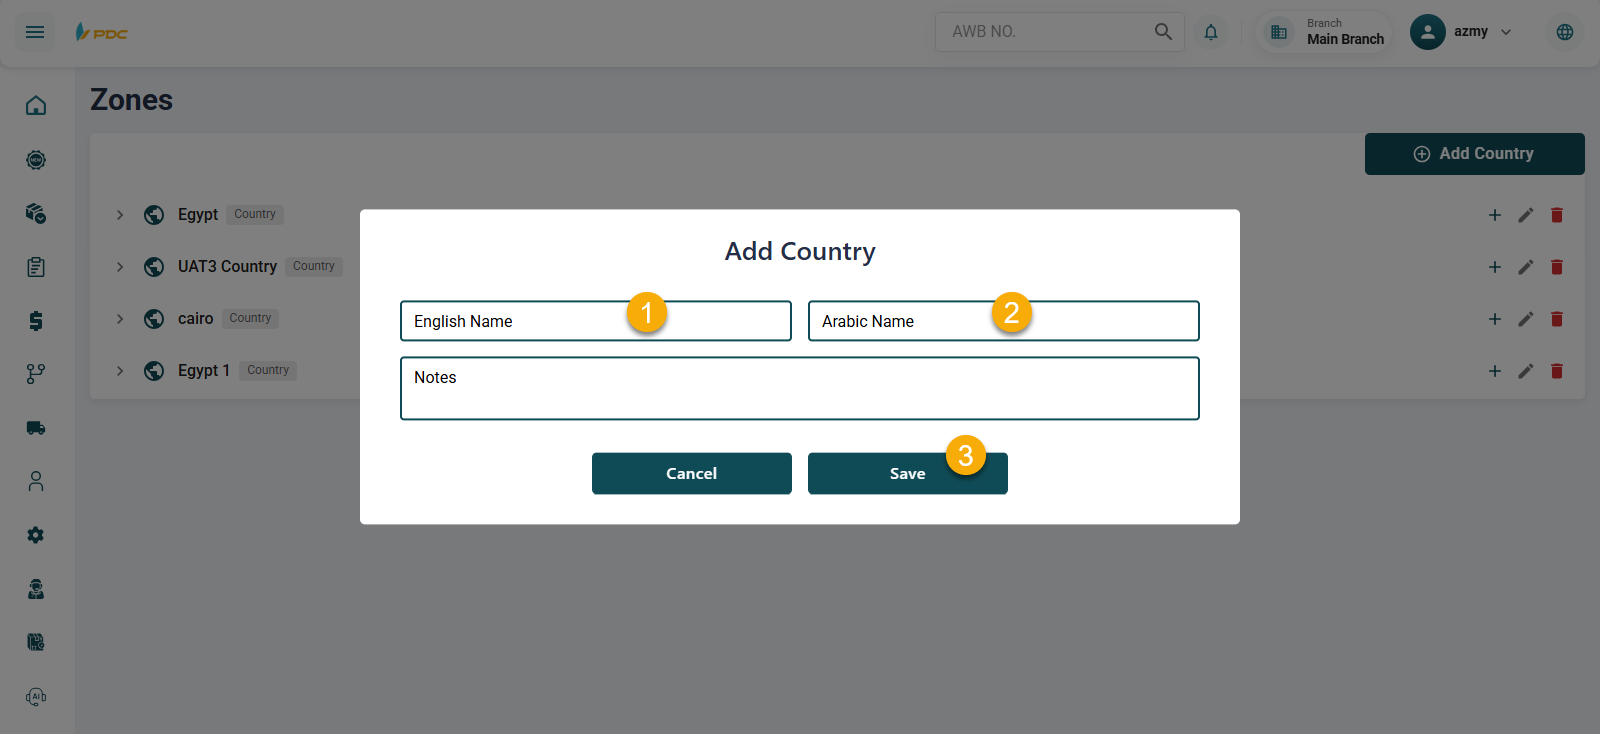
After entering the required information, click Save, and the country will appear in the list.
For each country, there are three action buttons:
- Add
- Edit
- Delete
Adding a Province (State)
By clicking the Add button next to a country, you can add a Province/State under that country.
Required Fields:
- Province Name (Arabic)
- Province Name (English)
Then click Save.

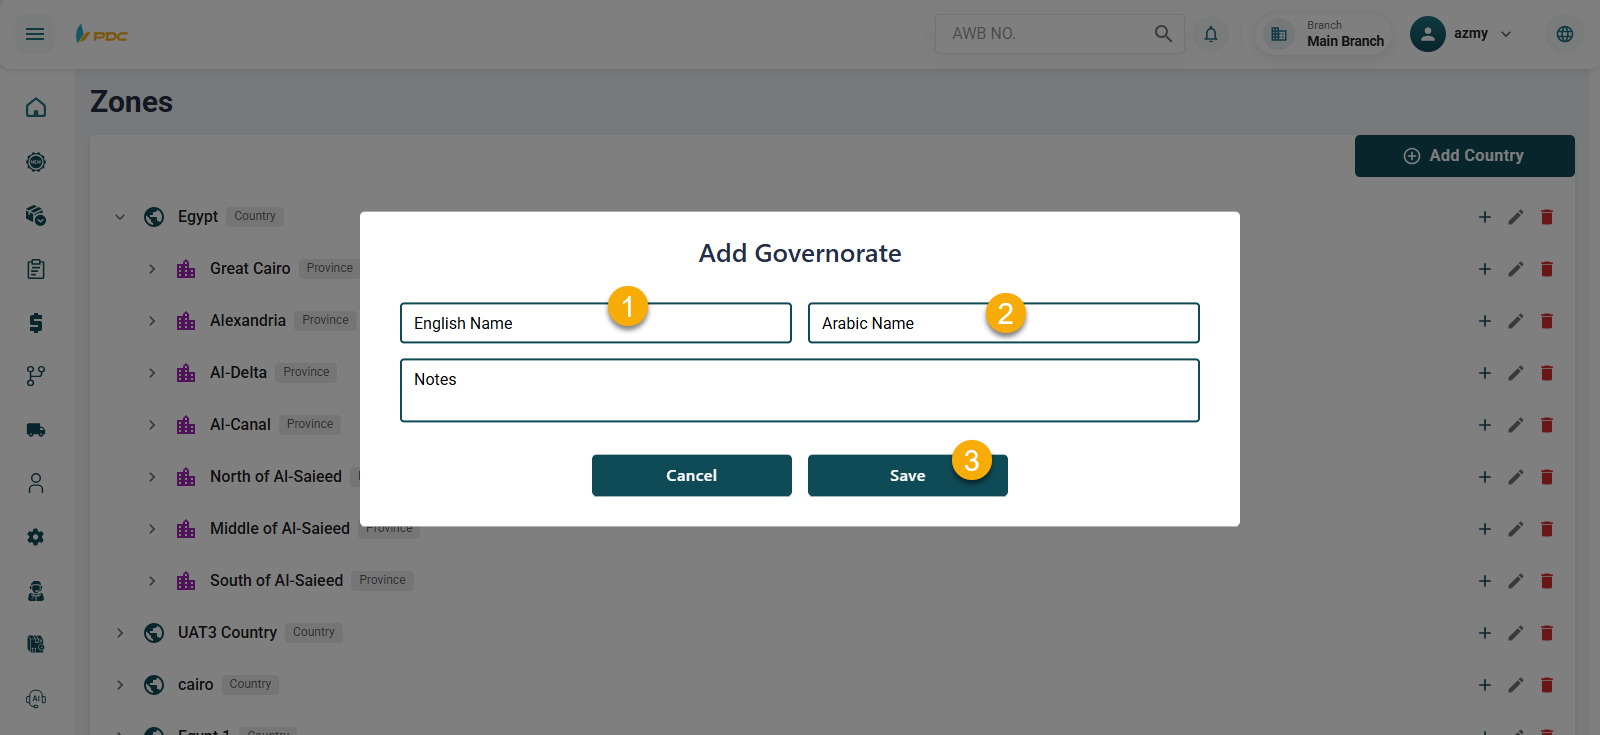
Adding a Governorate
By clicking the Add button next to a province, you can add a Governorate.
Required Fields:
- Governorate Name (Arabic)
- Governorate Name (English)
Then click Save.
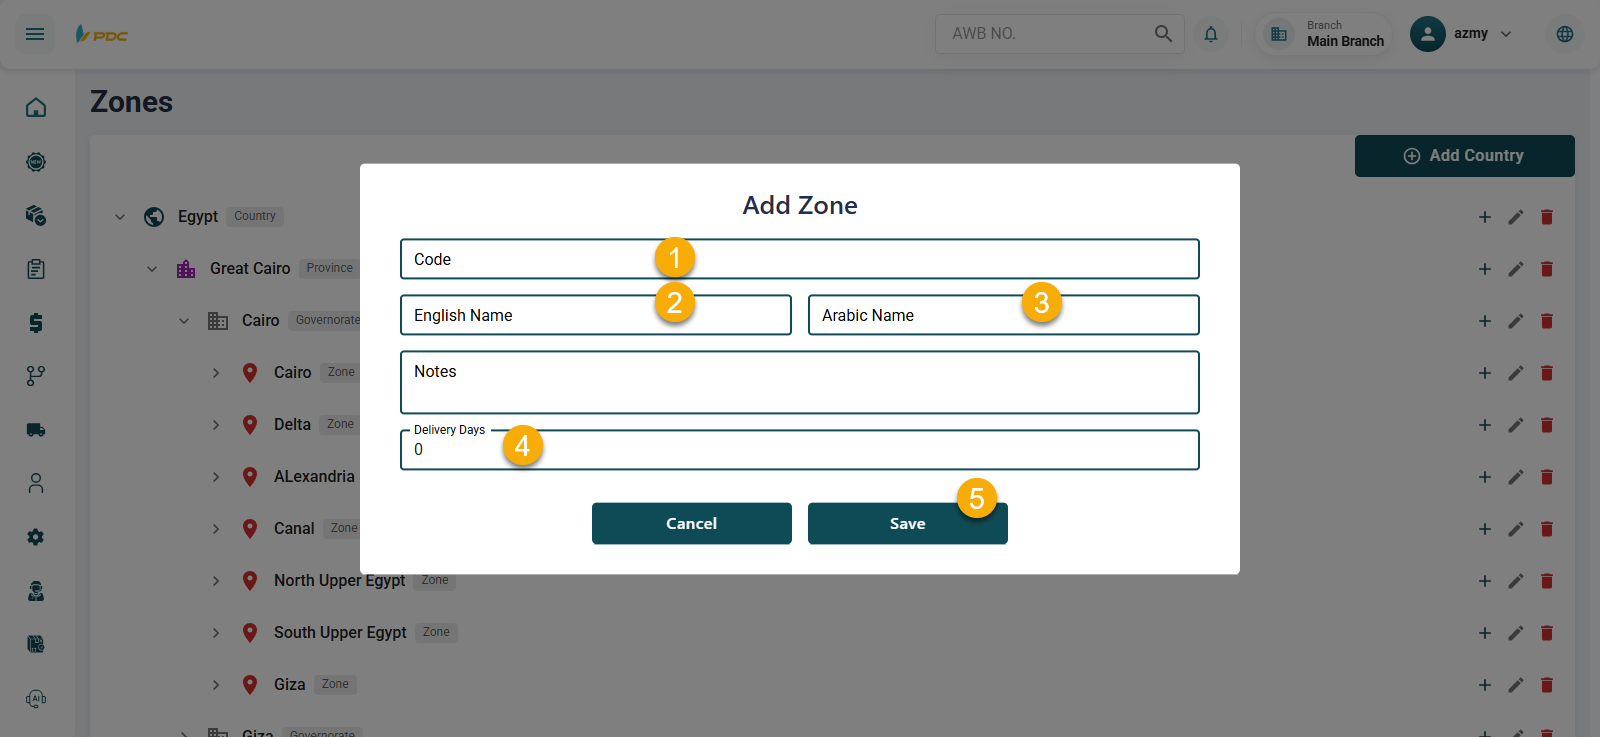
Adding an Zone (Pricing Level)
Next, you can add an Zone, which is used for pricing configuration in the price list.
Required Fields:
- Zone Code
- Zone Name (Arabic)
- Zone Name (English)
- Delivery Days
After saving, the Zone will be successfully created.
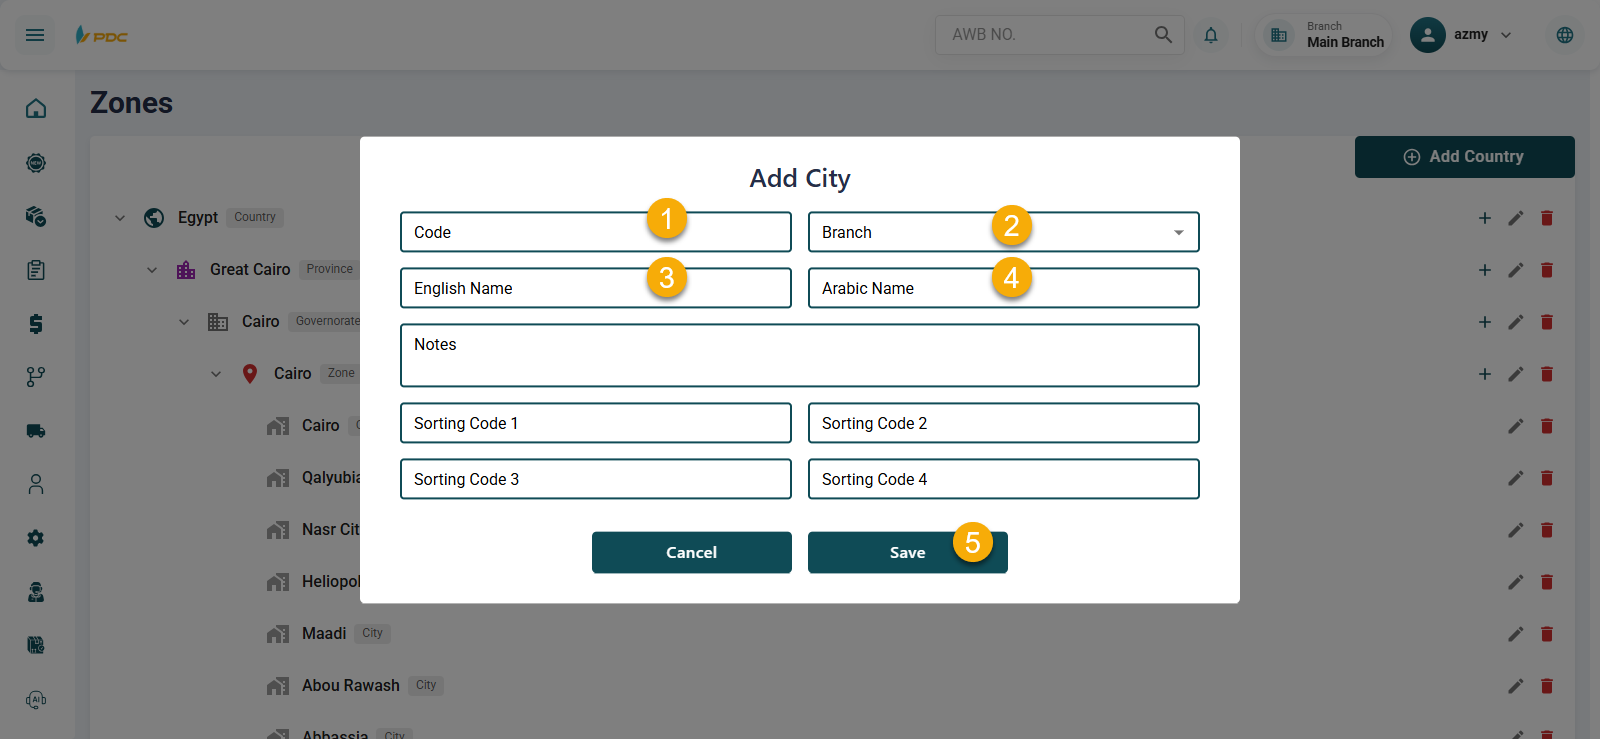
Adding a City
Finally, you can add a City, which is used when creating shipments in the system.
Required Fields:
- City Code
- Assign the City to a Branch
- City Name (Arabic)
- City Name (English)
Then click Save.
By completing these steps, the geographical structure (Country → Province → Governorate → Area → City) will be fully configured in the system.
You can also edit or delete any level within this structure at any time as needed.